How to configure multi-factor authentication in Microsoft 365
Case
You need to configure Multi-Factor authentication (MFA) in your Microsoft 365 tenant, for some or all your Microsoft 365 identities.
Solution
To increase the security of your Office 365 infrastructure, it is strongly recommended to configure MFA in all Office 365 user accounts. Multi-factor authentication means your admins and your users must provide more than one way to sign into Microsoft 365 and this is one of the easiest ways to secure your organization.
You have two options. You can either configure the legacy per-user MFA or enable MFA for all M365 identities by configuring the Security Defaults setting.
Option 1: Legacy per-user MFA
You can use this option if you need to enable MFA for individual users only. However bear in mind that it is highly recommended to enable MFA for all users using the security defaults option (see below section of this article).
First follow the steps below as a Microsoft 365 administrator user to enable the legacy per-user MFA setting:
- Log into the M365 admin portal at https://admin.microsoft.com as the global administrator user.
- Navigate to https://account.activedirectory.windowsazure.com/UserManagement/MultifactorVerification.aspx?BrandContextID=O365.
- Tick the checkbox next to the user(s) you need to enable MFA for and click on the Enable link on the right.
- Click enable multi-factor auth as shown in the example below.
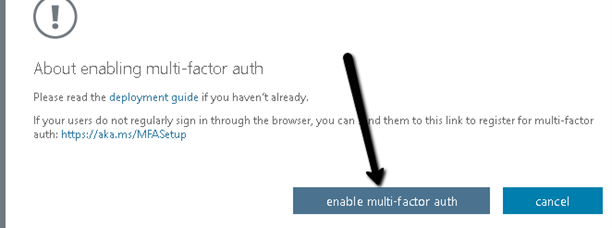
- You should receive a successful message as shown below. Click close and confirm that the MFA auth status of the user(s) chosen above is now Enabled or Enforced.
Now each of the users who have their MFA setting activated as per the above instructions must follow the instructions below:
- Logoff from any open Microsoft 365 services (Teams, Sharepoint Online, Onedrive, Exchange Online, Outlook).
- Open a browser window and navigate to https://aka.ms/mfasetup.
- When they logon they will be asked to provide additional information. Click Next to continue.
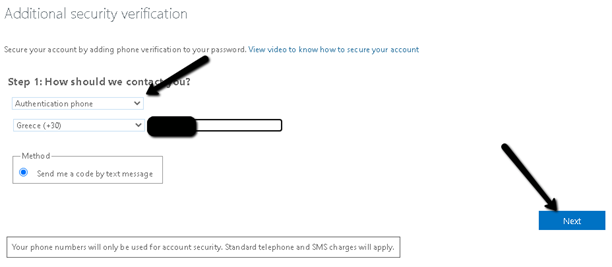
- For starters, choose “Authentication phone” as authentication phone, provide the user’s personal mobile phone and click Next.
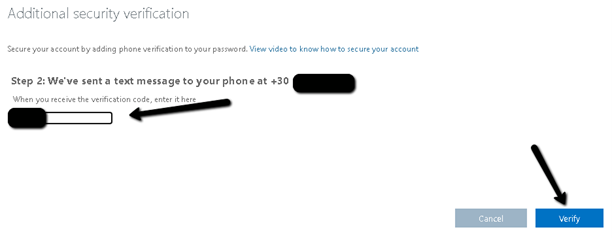
- Provide the code you received on your mobile by SMS and click Verify.
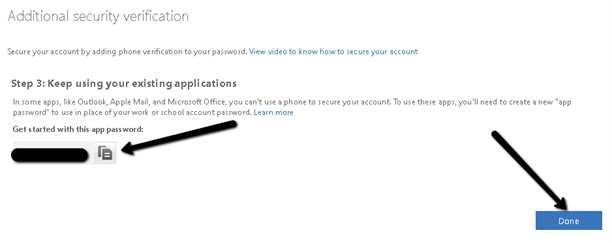
- Copy the generated app password and keep it stored in a safe location. This may be needed in some legacy apps and apps which do not support Office 365 MFA, such as Apple mail. Click Done to complete the procedure.
- Tick the don’t show again checkbox and click on Yes, to stay signed in without having to re-authenticate for a pre-defined time interval.
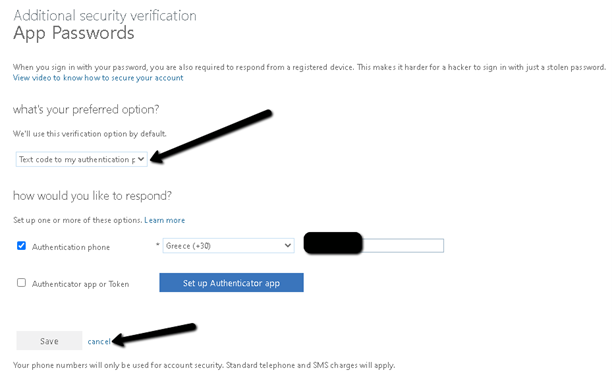
- On the next screen, you can optionally configure a second MFA method, such as a mobile authenticator application (Microsoft Authenticator mobile app). Or if you prefer to keep things simple, you can only use your mobile phone SMS for MFA. In this case simply choose in the drop-down box the “Text code to my authentication phone” as the preferred option and click cancel to proceed.
- You will now be redirected to your profile home page from which you can change your Office 365 password. You can access this page any time in the future by navigating to https://account.activedirectory.windowsazure.com/r/#/profile in order to change your Office 365 account password.
From this point onwards, any time you sign-in to your Office 365 account, you will have to provide an additional security Code sent via SMS to your mobile phone. You will need to follow the additional steps below each time to login:
- Click on your registered mobile phone to receive an MFA code by SMS.
- Enter the code you received by SMS and click Verify to proceed.
Option 2: Security defaults (recommended)
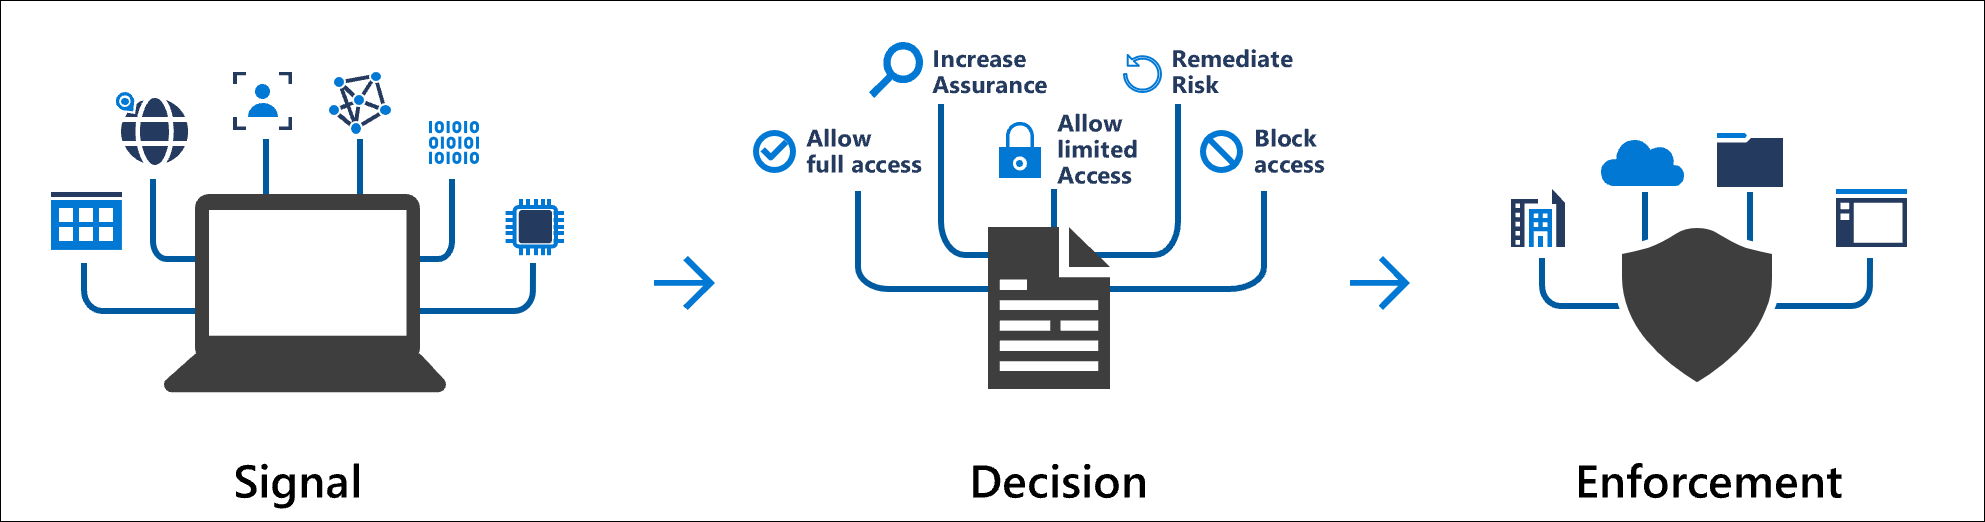
This option applies to all users and can be used in conjunction with Azure AD Conditional Access Policies. Conditional Access brings identity-driven signals together, to make decisions, and enforce organizational policies. Azure AD Conditional Access is at the heart of the new identity-driven control plane. Conditional Access policies at their simplest are if-then statements, if a user wants to access a resource, then they must complete an action.
Some common identity-driven signals for Azure AD Conditional Access are the following:
- User or group membership
- IP Location information
- Device
- Application
- Real-time and calculated risk detection
- Microsoft Defender for Cloud Apps

To configure security defaults, if you have previously turned on per-user MFA, you must turn it off before enabling Security defaults by navigating to the following page as a global admin user: https://account.activedirectory.windowsazure.com/UserManagement/MultifactorVerification.aspx?BrandContextID=O365. On the multi-factor authentication page, select each user and set their Multi-Factor auth status to Disabled.
If you have a newly created tenant, chances are that security defaults option is already enabled for your organization by default. If not, you can configure security defaults from the Azure AD admin center by navigating to https://aad.portal.azure.com/ as a global admin user.
Then follow the procedure below.
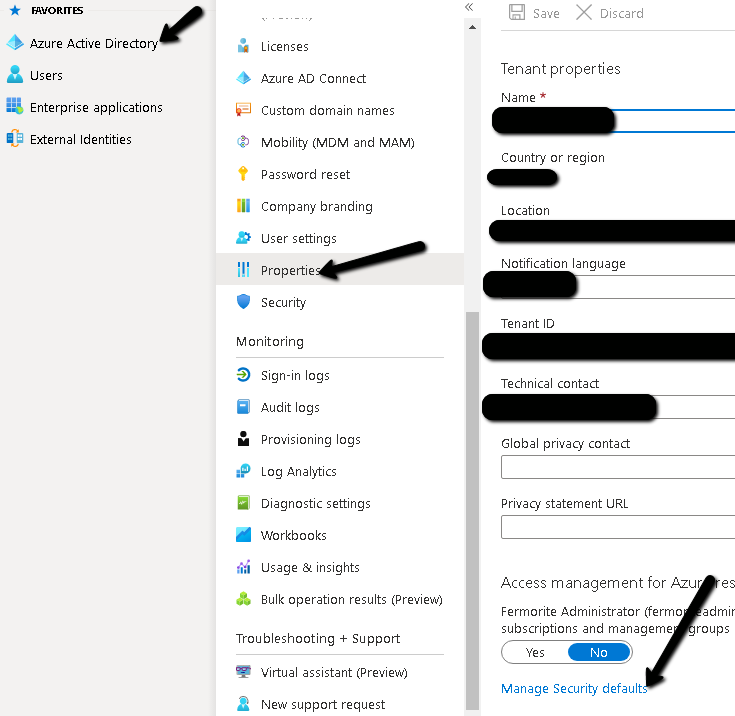
- In the Azure AD admin center choose Azure Active Directory --> Properties.
- At the bottom of the page, choose Manage Security defaults.
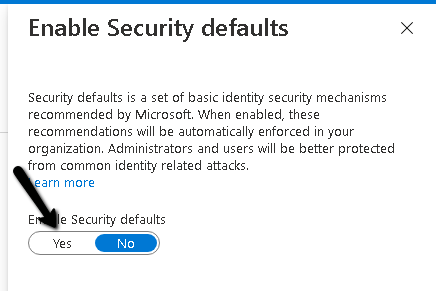
- Choose Yes to enable security defaults or No to disable security defaults, and then choose Save.
If you have any baseline Conditional Access policies, you will be prompted to turn them off before you can use security defaults.
Security defaults apply the following security measures:
- Requiring all users to register for Azure AD Multi-Factor Authentication.
- Requiring administrators to do multi-factor authentication.
- Blocking legacy authentication protocols.
- Requiring users to do multi-factor authentication when necessary.
- Protecting privileged activities like access to the Azure portal.
A more detailed analysis of Azure AD security defaults can be found at: https://techcommunity.microsoft.com/t5/azure-active-directory-identity/introducing-security-defaults/ba-p/1061414.
After the security defaults option are enabled, your end-users will be prompted to provide additional information for enabling MFA in their Microsoft 365 account, as explained in the previous section of this article.
Sources
https://stefanos.cloud/kb/how-to-configure-multi-factor-authentication-in-microsoft-365/


Comments
Post a Comment